Apply Colormaps
In DICOM Studio, you can apply distinct colormaps to your images, to enhance your view of the intricate details in each slice. The colormaps come in two sets:
- Perceptually Uniform Colormaps.
- DICOM Standard Color Palettes.
The primary feature of the Perceptually Uniform Colormaps is that when applied, equal steps in data are perceived as equal steps in the color space. These colormaps are frequently used in scientific study, and may be easily recognizable, with common examples including Jet, Hot, Bone and Plasma.
The DICOM Standard Color Palettes are defined in the DICOM Standard. They include:
- Hot Iron: The Hot Iron color palette is often used in nuclear medicine applications to make differences in signal intensity (counts) more apparent to the human observer.
- PET: The PET color palette is often used in PET applications to pseudo-color the superimposed PET images when displayed fused with underlying CT images.
- Hot Metal Blue: The Hot Metal Blue colour palette is often used in nuclear medicine or PET applications to make differences in signal intensity (counts) more apparent to the human observer.
- PET 20 Step: The PET 20 Step colour palette is often used in PET applications to make differences in signal intensity (counts) more apparent to the human observer.
- Spring, Summer, Fall & Winter: These Colour Palettes are suggested for use in colour fMRI activation maps. They shade from one pastel colour to another which is distinctly different, making them suitable for illustrating either unipolar or bipolar activation. They convey activation strength within one statistical parametric map, while making it possible for the human observer to distinguish between different fMRI activation maps in the same blended display.
Learn more about them here.
Colormap Application
Tap the Colormap button in the Viewer toolbar, and a menu will open with all available colormaps. Grayscale is active by default. Once you have images loaded into the Viewer, open the menu, and pick a colormap. It will be applied instantly.
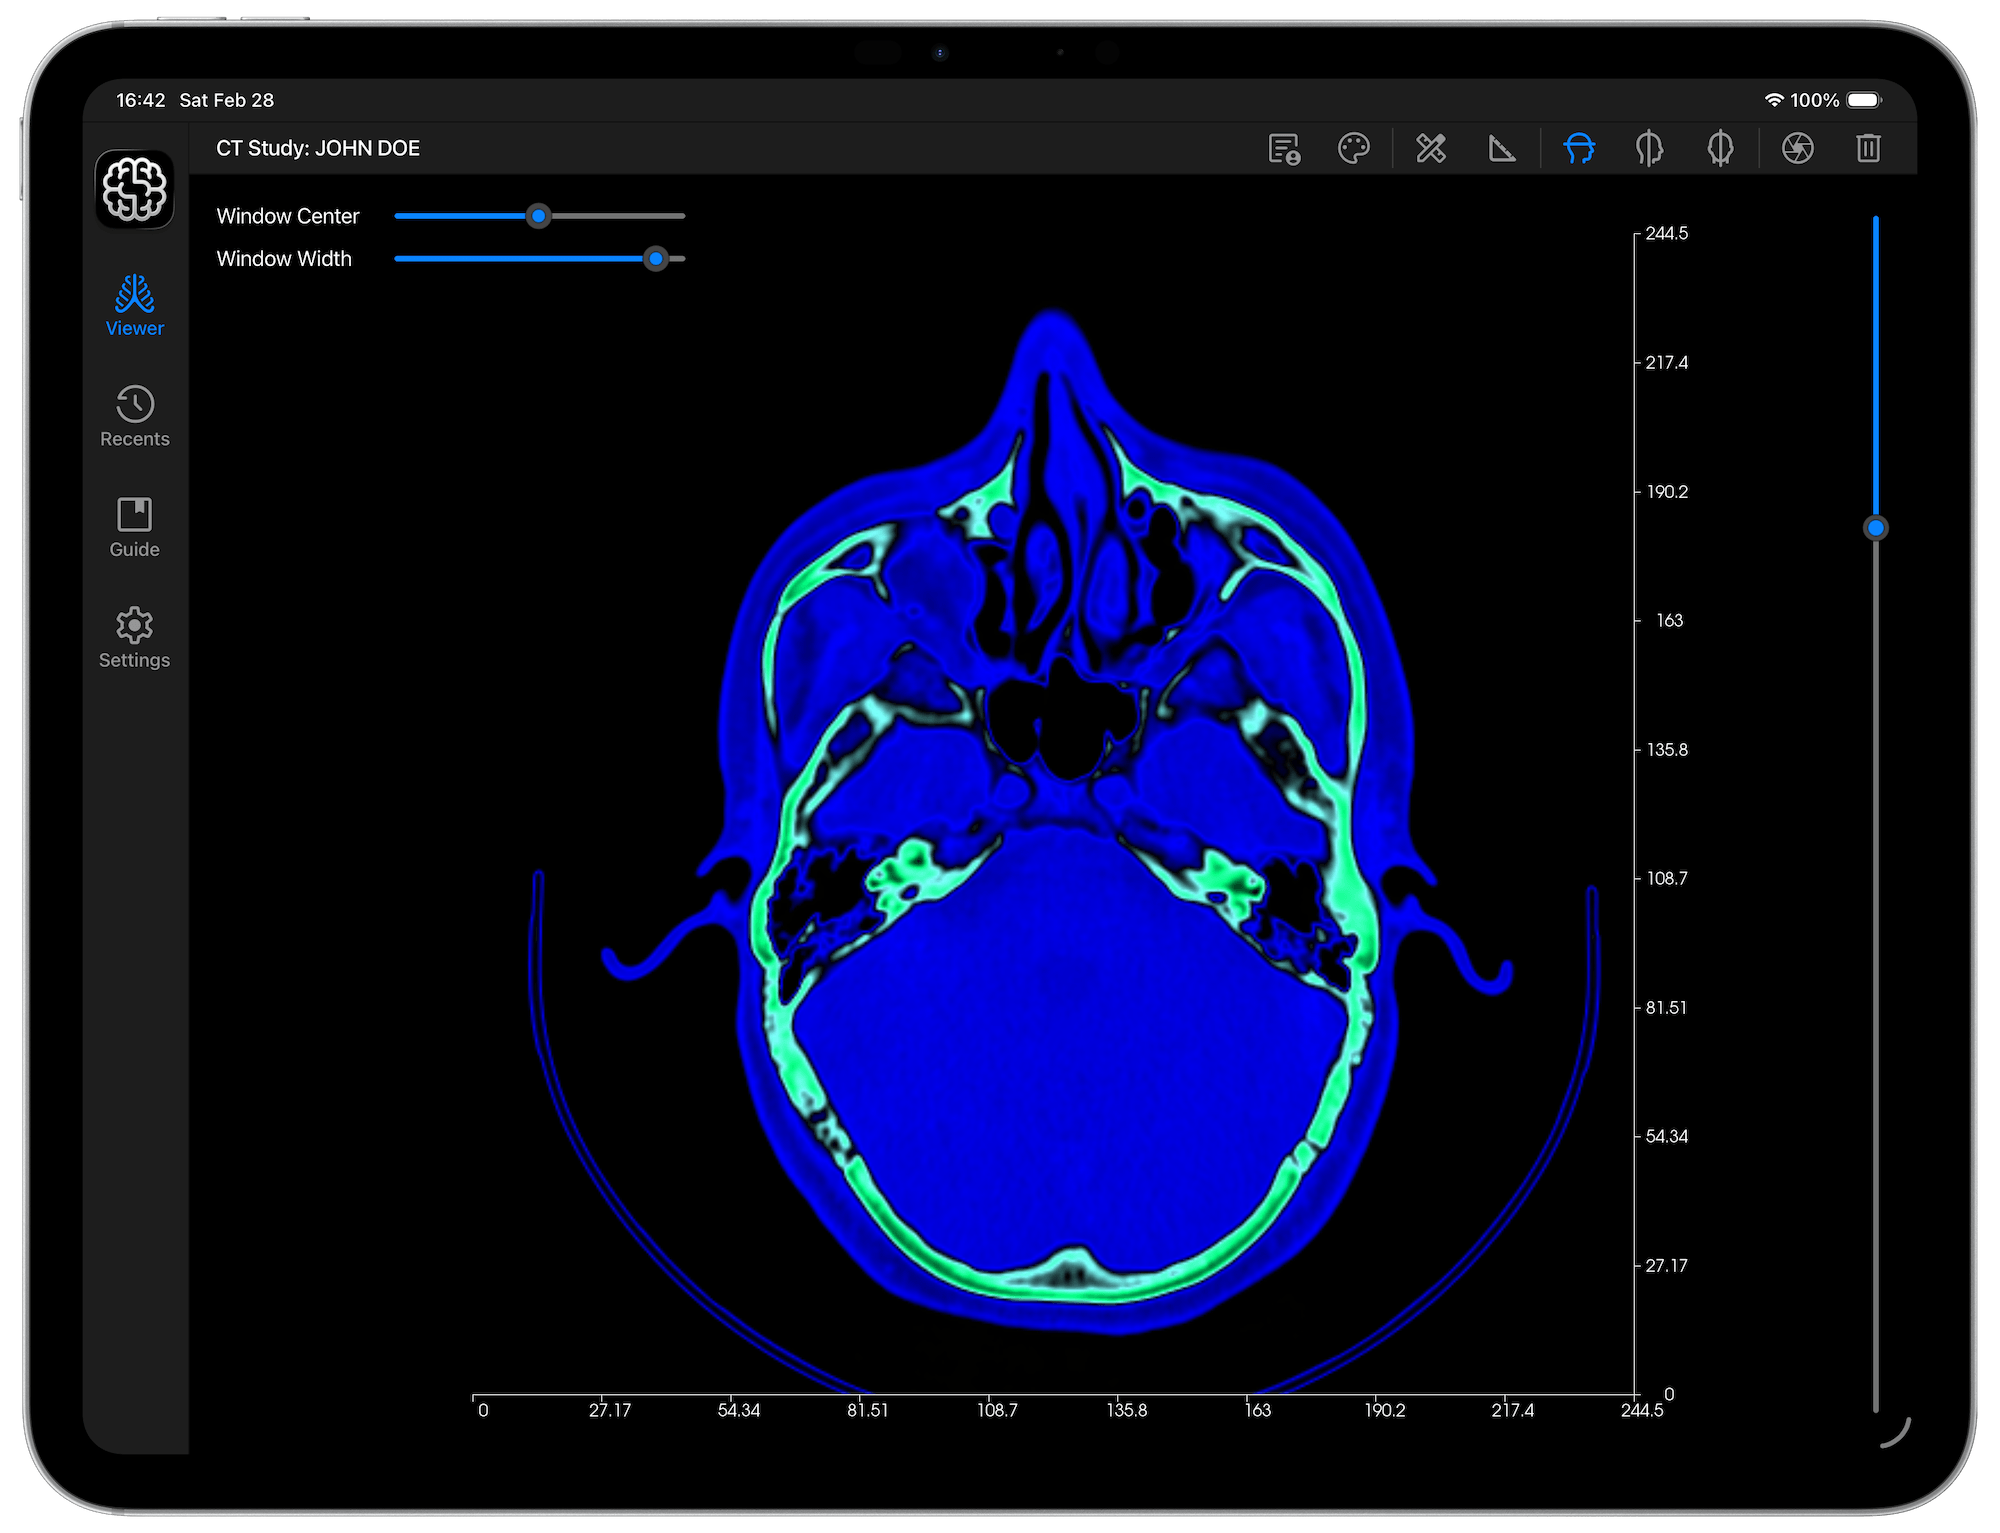

DICOM Windowing: Window Center & Window Width
In the visualization of DICOM images, Window Center and Window Width are critical attributes that control how raw pixel intensity values are mapped to a visible grayscale range on screen. This is called windowing or leveling, and it's fundamental to diagnostic image display.
DICOM images (especially CT) store pixel data across a very wide dynamic range. CT, for instance, uses Hounsfield Units (HU) spanning roughly -1024 to +3071 (a range of ~4096 values). Human monitors can only display 256 shades of gray (8-bit), and the human eye can only distinguish maybe 30-70 simultaneous shades at once. Windowing solves this by selecting a subset of the full range and stretching it across the full 0-255 display range, discarding everything outside as pure black or pure white.
Window Center (DICOM Tag: 0028, 1050)
Also called the Level, this parameter defines the midpoint of the intensity range you want to display. Pixel values at this number will appear as mid-gray on screen. In practice, values below center - (width/2) are rendered pure black, while values above center + (width/2) are rendered pure white.
Window Width (DICOM Tag: 0028, 1051)
Also called the Window, this parameter defines the total span of intensity values that map to the full grayscale range. A narrow window width increases contrast by focusing on a smaller range of pixel intensities, making subtle differences in intensity more noticeable. Conversely, a wider window width reduces contrast by encompassing a broader range of intensities.
Impact on Contrast and Brightness
In DICOM Studio, these two parameters are not just applied in grayscale, but to any active colormap. You can adjust the brightness and contrast in real-time. For example, narrowing the window width enhances contrast, which is useful for identifying fine details like small lesions or nodules. Adjusting the window center can shift focus between darker and lighter regions, aiding in specific diagnostic tasks.
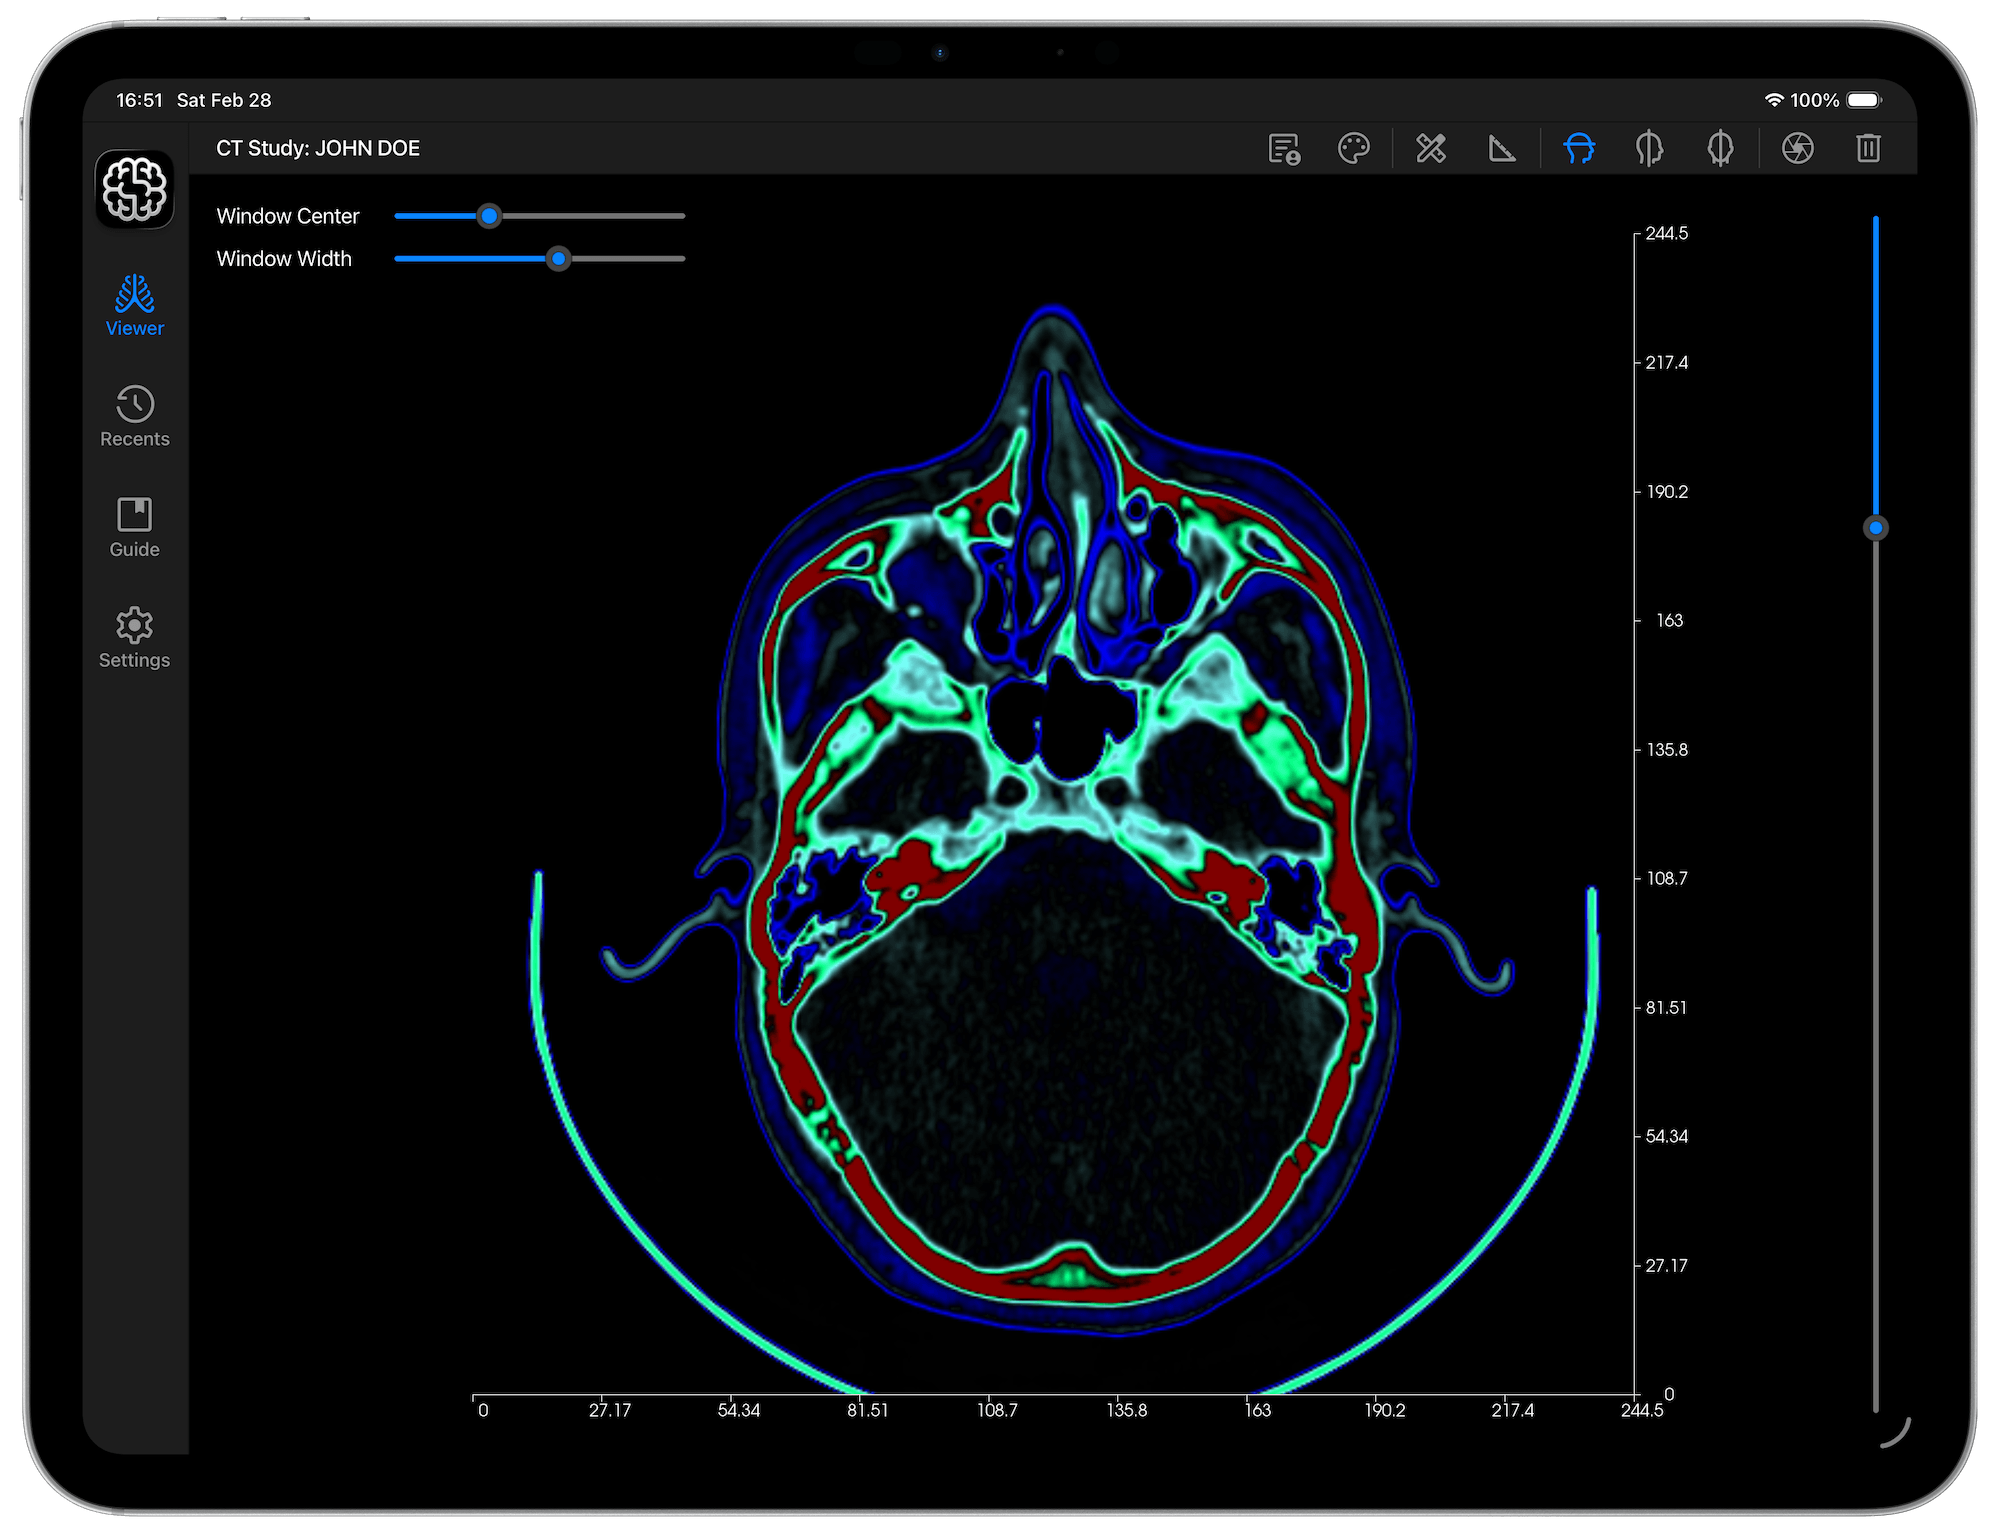
Take the example above, the Window Center has been lowered, and the Window Width narrowed. Compare this with the previous image earlier in this section. This is the same image. Adjusting the window center and window width directly affects how details in the image are perceived.
Use the Window Center and Window Width sliders found to the top-left of the Viewer, to further customize your image visualization, and enhance diagnostic accuracy. These sliders are shown by default, however, if you don't want to use them you can hide them from the settings tab, by toggling the Window Center & Window Width switch. Your preference will be saved.
Black Colormap Base
This tool applies to colormaps whose initial color isn't black. To enhance contrast in your image, you may want to alter the colormap, and set the base color to black. Take the images below as an example. The image to the left shows a DICOM image with the 'Gist_ncar reversed' colormap applied. To the right is the same image, with the initial color changed to black.
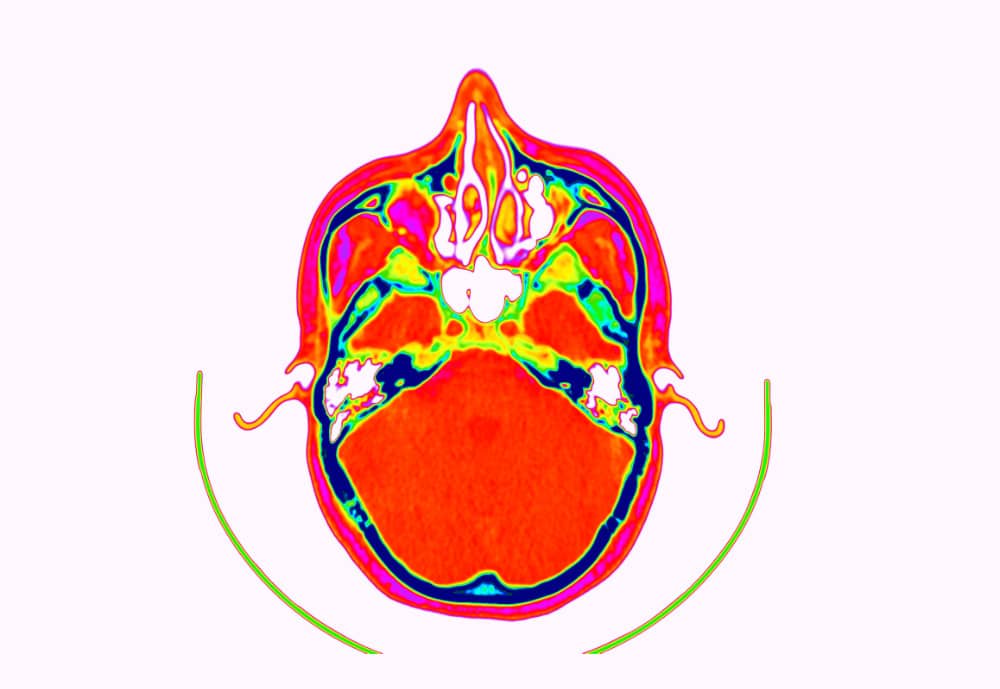
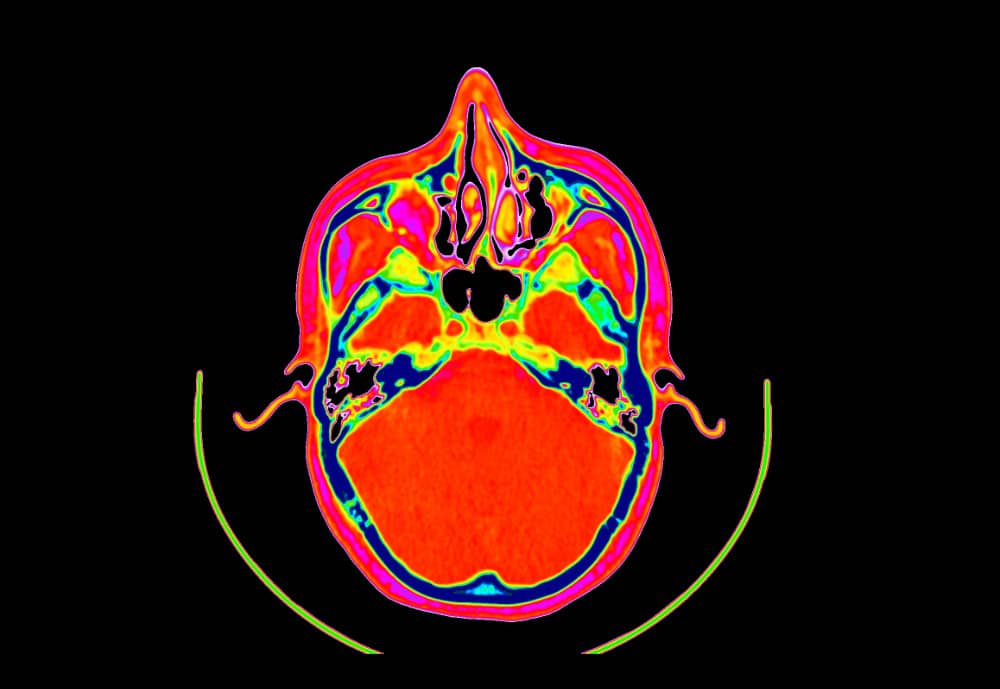
Activate the application of a Black Background to all your colormaps from the settings tab, by toggling the 'Black Colormap Base' switch. Your preference will be saved